You can offer courses with Bookeo. A course is a series of classes, where customers register for all the classes with one booking. For example, a 6-week course with one class per week.
Late enrollments and drop-in bookings
You can also accept late enrollments (after the course has started) and, if you wish, drop-in class bookings for your courses.To set up a course:
1. Go to Settings>Classes, Courses, events.
2. Click on the New button, then on Course.
You will complete a quick set up wizard, and will be able to define more details later.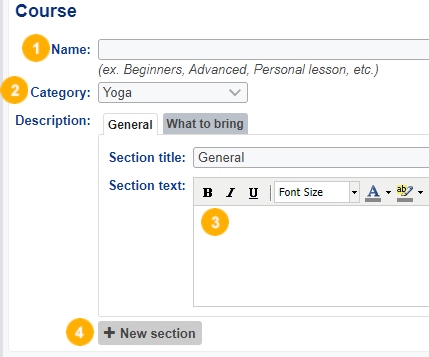
3. Input the Name[1] of the course. If you have already created categories, from the Category[2] scroll down menu, select the category this course belongs to.
4. Input a Description[3] of the course.
5. Click on the New section[4] button to create information sections (such as "What to bring", "More info" and so on).
6. In the Schedule section, click on the New course[5] button to create a course.
In the pop-up window that will open, input the Title[6] of the course that you are creating and the number of seats[7] (students).
7. Click on the Add new class to this course[8] to add classes [a pop-up window will open].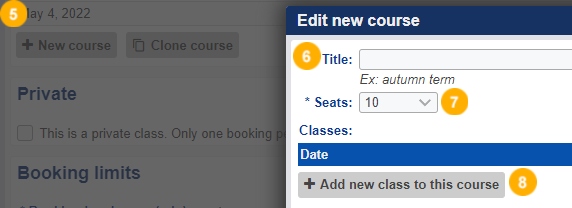
8. Select the start date, start time, duration, teacher, location[9] of the first class of your course.
From the Repeat[10] scroll down menu, select how often (i.e. weekly) a class is held for this course, and for how many times.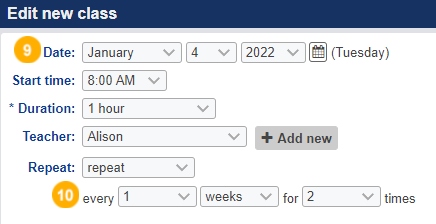
9. Save.
10. A summary of all the classes of this course will be shown in a table. You can change the date, time, teacher, location any time, by clicking on the specific class and changing its settings.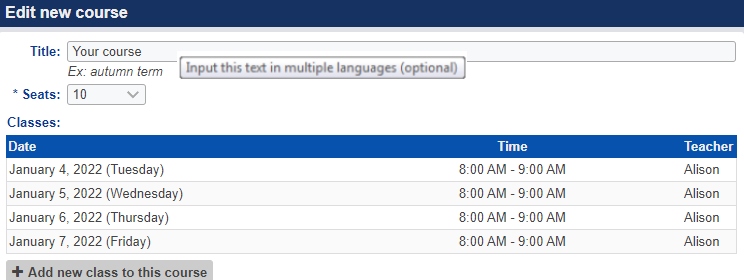
11. Tick the Private[11] checkbox if you want to accept only one booking per time slot, regardless of the number of participants.

12. From the Course booking mode[12] dropdown menu, select if you want to create a single booking for all the classes booked or one booking for each class booked. Click here to learn more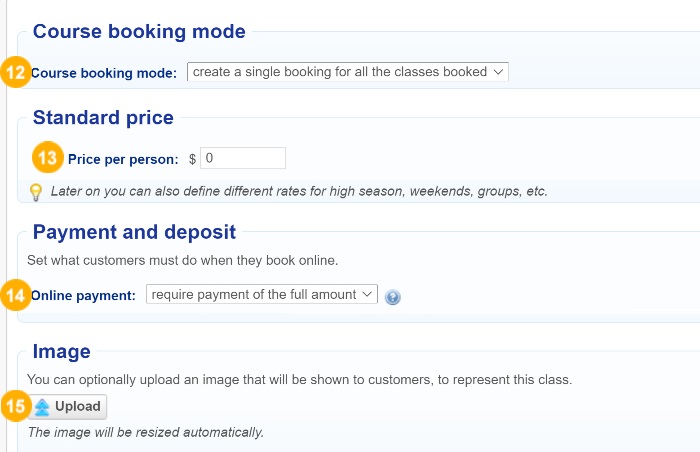
12. In the Standard price section, set the course Price[13]
When you finish the setup wizard, you will also be able to:
13. From the Online payment[14] dropdown menu, select your preferred online payment option (payment of the full amount, deposit, collect credit card number...).
When you finish the setup wizard, you will also be able to set:
14. In the Image[15] section, click on the Upload button to upload an image for your course. When you finish the setup wizard, you will also be able to upload a gallery of Images and videos after finishing the setup wizard.
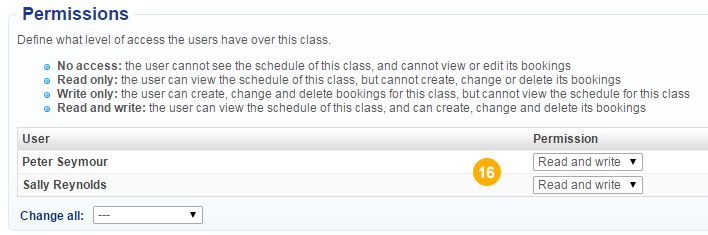
15. In the Permissions[16] section, set account users permissions for this course.
16. Save.